
Introduction
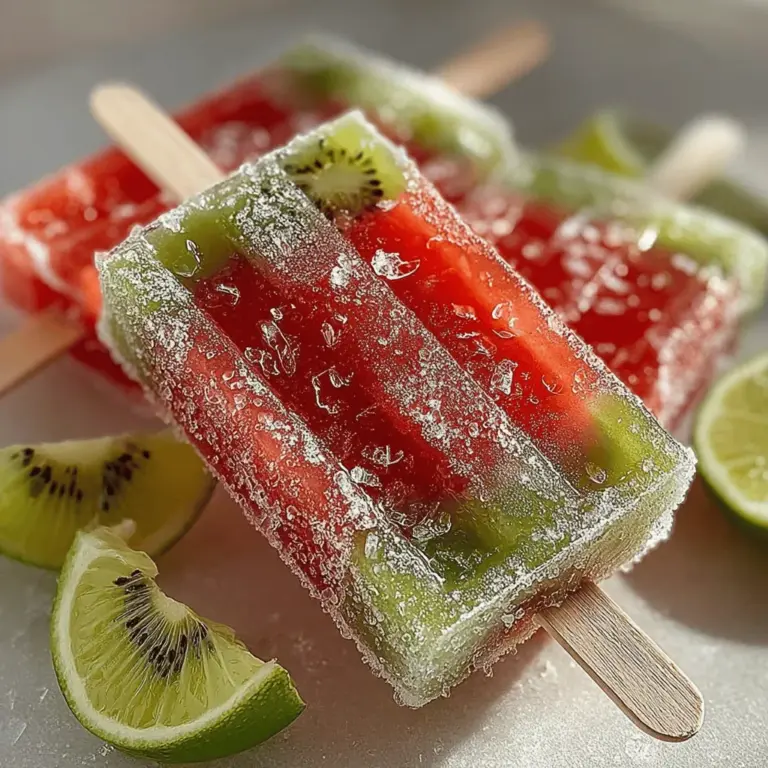
As the summer sun blazes down, there’s nothing quite as refreshing as a homemade popsicle. Few treats can compare to the invigorating chill of a popsicle on a warm day, and what better way to embrace the season than with these Watermelon Kiwi Layered Pops? This vibrant and delicious dessert combines the juicy sweetness of watermelon with the tangy flavor of kiwi, making it not only a delightful indulgence but also a healthy option for anyone looking to cool off during the hot months.
Watermelon and kiwi are both in their prime during the summer, making this recipe a perfect choice for seasonal enjoyment. The bright colors and refreshing flavors of these fruits are sure to please both children and adults alike, providing a fun and nutritious way to stay cool. In this article, we will explore the numerous health benefits of these ingredients, provide a step-by-step guide to making these pops, and share some creative ways to enjoy them.
The Health Benefits of Watermelon and Kiwi
Nutritional Profile of Watermelon
Watermelon is more than just a juicy summer snack; it’s a nutritional powerhouse packed with essential vitamins and minerals. A single serving of watermelon contains significant amounts of vitamins A and C, which are vital for maintaining healthy skin and boosting the immune system. The high water content of watermelon also makes it an excellent choice for hydration, especially during the sweltering summer months. In fact, watermelon is composed of about 92% water, making it one of the most hydrating fruits available.
Moreover, watermelon is rich in antioxidants, such as lycopene, which may help reduce inflammation and protect against various diseases. With its low calorie count, watermelon serves as an ideal guilt-free treat that can satisfy your sweet cravings while providing nourishment. Incorporating watermelon into your diet can contribute to better skin health, improved hydration levels, and overall wellness, making it a perfect ingredient for our layered pops.
Kiwi’s Nutritional Powerhouse
Kiwi is often referred to as a superfood, and for good reason. This small, green fruit is packed with a wealth of nutrients that can significantly benefit your health. One of the standout features of kiwi is its exceptionally high vitamin C content, which is crucial for the immune system, skin health, and collagen production. In fact, a single kiwi contains more vitamin C than an orange!
In addition to vitamin C, kiwi is a great source of dietary fiber, which aids digestion and promotes gut health. It also contains antioxidants that help combat free radicals in the body, contributing to overall health and vitality. The unique combination of sweetness and tanginess in kiwi makes it an ideal complement to the mild flavor of watermelon, creating a balanced and refreshing treat.
The Perfect Summer Treat
Not only are these Watermelon Kiwi Layered Pops refreshing, but they also represent a guilt-free indulgence in a world where sugary desserts often dominate. As summer temperatures rise, the importance of healthy snacking becomes paramount. With these pops, you can enjoy a delicious treat without the excess calories and artificial ingredients found in many store-bought options.
These layered pops are not only a fun way to cool off, but they’re also an excellent choice for a family-friendly dessert that encourages healthy eating habits. By incorporating fresh fruits into your diet, you can help your family develop a taste for natural sweetness and nutritious foods, making these pops a delightful addition to your summer menu.
Ingredients Breakdown
Fresh Watermelon: The Star Ingredient
The star of our Watermelon Kiwi Layered Pops is undoubtedly the fresh watermelon. Choosing the right watermelon is crucial for achieving the best flavor and texture. When selecting a watermelon, look for one that is symmetrical, firm, and heavy for its size. A ripe watermelon should have a uniform skin color and a dull spot, indicating it has ripened on the ground.
Watermelons are typically in season from May to September, so during these months, you can find the juiciest and most flavorful varieties. For the best results in your pops, aim to use a watermelon that is perfectly ripe, as this will enhance the overall taste and ensure maximum juiciness when blended.
The Zing of Lime Juice
To elevate the flavors of our watermelon and kiwi, a splash of lime juice is added to the mix. Lime juice not only enhances the natural sweetness of the fruits but also provides a refreshing zing that balances the flavors beautifully. Additionally, lime juice is packed with antioxidants and vitamin C, adding even more health benefits to our pops.
Incorporating lime juice into your pops can also enhance their visual appeal, as it adds a lovely brightness to the overall flavor profile. Just a little squeeze goes a long way in making these pops truly stand out.
Optional Sweetness: Honey and Agave Syrup
While watermelon and kiwi are naturally sweet, some may prefer to add an extra touch of sweetness. Honey and agave syrup are excellent natural sweeteners that can complement the flavors of our pops without overwhelming them. Honey, with its distinct flavor and numerous health benefits, can add depth to the sweetness. It’s also known for its antibacterial properties and is a healthier alternative to refined sugar.
Agave syrup, on the other hand, has a milder flavor and is a great option for those looking for a vegan alternative to honey. It has a lower glycemic index, making it a suitable choice for those managing blood sugar levels. Both sweeteners can be used to taste, allowing you to customize the level of sweetness to your liking.
Coconut Water: A Tropical Twist
To give the Watermelon Kiwi Layered Pops an extra refreshing twist, consider adding coconut water to the mix. Coconut water is not only hydrating but also packed with electrolytes, making it an ideal ingredient for a summer treat. The subtle coconut flavor complements the other ingredients beautifully, providing a tropical flair that enhances the overall experience.
Using coconut water in your pops can help you stay hydrated during those hot summer days, making these treats not just delicious but also functional. If you prefer a lighter version of the pops, substituting some of the watermelon juice with coconut water will create a delightful fusion of flavors.
Step-by-Step Instructions
Creating Watermelon Kiwi Layered Pops is a fun and straightforward process that can involve the whole family. Follow these simple steps to make your own refreshing summer treat:
1. Prepare the Watermelon Puree: Start by cutting a ripe watermelon into chunks. Using a blender, puree the watermelon until smooth. For added flavor, you can mix in a splash of lime juice and sweeten to taste with honey or agave syrup.
2. Prepare the Kiwi Puree: Next, peel and slice the kiwis and blend them until smooth. Just like with the watermelon, you can add a splash of lime juice and sweetener if desired. The vibrant green color of the kiwi will create a striking contrast against the pink watermelon puree.
3. Layer the Mixtures: In popsicle molds, begin by pouring a layer of the watermelon puree into each mold. Fill them about halfway, then place the molds in the freezer for about 30 minutes or until the layer is slightly firm.
4. Add the Kiwi Layer: Once the watermelon layer is set, carefully add the kiwi puree on top of the watermelon layer. You can use a spoon to create a layered effect or swirl the two mixtures together for a marbled appearance.
5. Freeze and Serve: Insert the popsicle sticks and return the molds to the freezer. Allow the pops to freeze for at least 4-6 hours, or until fully solid. Once frozen, run warm water over the outside of the molds to help release the pops. Enjoy your homemade Watermelon Kiwi Layered Pops as a refreshing summer snack!
By following these steps, you can create a vibrant and delicious treat that embodies the essence of summer. The combination of fresh watermelon and kiwi not only offers a delightful taste but also provides a host of health benefits, making these layered pops a perfect addition to your summer repertoire. Stay tuned for more tips on how to customize and enjoy these refreshing pops!
{{image_2}}
Preparing the Watermelon Layer
To create the watermelon layer of your pops, begin by selecting a ripe, sweet watermelon. This is crucial, as the sweetness of the fruit will significantly influence the overall flavor of your pops. Start by cutting the watermelon into chunks and removing the seeds. Place the chunks into a high-powered blender or food processor.
Next, add the juice of one lime to the blender; this will provide a zesty contrast to the sweetness of the watermelon. If you prefer a sweeter taste, consider adding a tablespoon of honey or agave syrup at this stage. Blend the mixture on high until it reaches a smooth consistency, ensuring there are no solid pieces remaining. A well-blended mixture will create a uniform texture, which is key to achieving that delightful mouthfeel in the finished pops.
Taste the mixture and adjust as necessary. If it needs a little more sweetness, add a touch more honey. If you desire a tangier flavor, a bit more lime juice can enhance the taste profile. Once you’re satisfied with the flavor, pour the blended mixture into a measuring cup or pitcher, ready for the straining process.
Straining for Smoothness
Straining the watermelon mixture may seem like an extra step, but it is essential for creating popsicles with a refined texture. By using a fine mesh strainer or cheesecloth, you can remove any pulp or fibrous bits that may remain after blending. This will ensure your watermelon layer is smooth and silky, contributing to a more enjoyable eating experience.
To strain, simply place the strainer over a bowl and pour the watermelon mixture into it. Use a spatula or the back of a spoon to press the liquid through while leaving the solids behind. This process may take a few minutes, but it will be worth it for the final product. Collect all the smooth liquid in a bowl; this is your watermelon layer, ready to be poured into your popsicle molds.
Crafting the Kiwi Layer
Creating the kiwi layer follows a similar process to the watermelon layer. Start by peeling and chopping ripe kiwis. Place them in the blender with the juice of half a lime and a splash of coconut water, if desired. The coconut water not only adds a subtle sweetness but also enhances the tropical flavor profile of the pops. Blend the ingredients until they are completely smooth.
After blending, taste the kiwi mixture. Kiwas can vary in sweetness, so you may want to add a teaspoon of honey or another sweetener to balance out the tartness. Adjust according to your preference—remember, the goal is to create a harmonious blend of sweet and tangy flavors.
Once achieved, consider straining the kiwi mixture as well. Although kiwis are naturally softer, straining can help eliminate any small seeds that might disrupt the popsicle’s texture. Follow the same straining method as outlined for the watermelon layer, and then set the kiwi layer aside while you prepare for the layering process.
Layering Techniques for Visual Appeal
Layering your pops is not only about flavor but also about creating an attractive presentation. Start by pouring a small amount of the watermelon mixture into the bottom of your popsicle molds. Fill them about one-third of the way full, then gently tap the molds to remove any air bubbles and ensure an even layer.
Place the molds in the freezer for about 30 minutes or until the watermelon layer is firm to the touch. Once set, carefully pour the kiwi mixture over the frozen watermelon layer. Take care to pour slowly and evenly to avoid disrupting the watermelon layer beneath. Fill the molds to about two-thirds full, and again, freeze for another 30 minutes.
Once the kiwi layer is set, repeat the process with the remaining watermelon mixture, filling the molds to the top. This technique not only creates stunning visual layers but also ensures that each bite will be a delightful mix of flavors. If you notice any air bubbles forming, use a toothpick to gently pop them before returning the molds to the freezer.
Freezing to Perfection
Patience is key when it comes to freezing your pops. Each layer needs adequate time to set before adding the next. To achieve a firm and perfectly structured popsicle, allow each layer to freeze for at least 30 minutes. If you’re making a larger batch or simply want to ensure complete firmness, consider freezing for an hour between layers.
Once the pops are filled to the top with the final layer, cover the molds with their lids (if available) or aluminum foil. This will protect the pops from absorbing any unwanted odors from the freezer. Freeze the pops for at least 4-6 hours or overnight for the best results. The longer they freeze, the easier they will be to unmold.
Unmolding the Pops
When it’s time to enjoy your homemade watermelon kiwi pops, the unmolding process is crucial to ensure they come out smoothly without breaking. Begin by removing the molds from the freezer. To help release the pops, run warm water over the outside of the molds for a few seconds. This slight heat will help melt the outer layer of ice, allowing for a smoother release.
Gently pull on the stick of the popsicle while twisting the mold slightly to loosen it. If the pops are stubborn, you may need to dip them in warm water for a few additional seconds. Be careful not to let the pops sit in the water for too long, as this can cause them to start melting. Once they’re free, place them upright in a glass or on a platter.
Presentation and Serving Ideas
Creative Ways to Serve Watermelon Kiwi Pops
Presentation can elevate any dish, and these pops are no exception. Arrange your colorful watermelon kiwi pops on a decorative platter, and consider garnishing them with fresh mint leaves or lime slices for a vibrant touch. You can also sprinkle some toasted coconut flakes on top for added texture and flavor.
If you’re hosting a summer gathering, consider serving these pops in a bucket filled with ice, allowing guests to easily grab their favorite flavor while keeping them cool. Another fun idea is to serve them alongside a refreshing fruit salad or yogurt dip, offering a variety of textures and flavors that complement the pops beautifully.
Pairing Suggestions for the Pops
These Watermelon Kiwi Layered Pops pair wonderfully with other summer delights. For a balanced snack, consider serving them with a light cheese platter featuring creamy goat cheese or a tangy feta. The pops’ sweet and tart notes will contrast nicely with the savory elements.
Additionally, they make a perfect addition to backyard barbecues or picnics. Pair them with grilled chicken or fish, and you have a light, refreshing meal that embodies summer. For drinks, consider serving them with a sparkling lemonade or a refreshing iced tea, enhancing the overall experience of your summer gathering.
Conclusion
In conclusion, Watermelon Kiwi Layered Pops are not just a delightful treat for hot summer days; they exemplify how simple, fresh ingredients can come together to create something spectacular. With their vibrant colors and refreshing flavors, these pops are sure to become a staple in your summer repertoire. The layering technique not only adds visual appeal but also enhances the experience of each bite, allowing you to savor the unique flavors of watermelon and kiwi.
Embrace the joy of making these pops at home, and enjoy a healthy, delicious snack that embodies the spirit of summer. Whether you’re cooling off by the pool, hosting a barbecue, or simply indulging in a sweet treat on a hot day, these layered pops will satisfy your cravings and impress your friends and family. So grab your ingredients and get started on this refreshing adventure today!
