
As the sun shines brighter and temperatures rise, the appeal of frozen desserts becomes undeniable. There’s something refreshing about indulging in a cool treat during warm weather, and frozen desserts have carved out a special niche among seasonal favorites. Among these, few desserts hold a candle to the classic strawberry shortcake. This beloved treat combines sweet, luscious strawberries with fluffy cake and rich cream, making it a quintessential summer delight.
However, preparing a traditional strawberry shortcake can be time-consuming, often requiring baking and assembly. Enter frozen strawberry shortcake bars—a delightful, easy-to-make alternative that merges convenience with flavor. These bars capture the essence of the classic dessert while offering a portable, no-bake option that is perfect for summer gatherings, picnics, or simply enjoying at home. The combination of a buttery graham cracker crust, a creamy strawberry filling, and the lightness of whipped cream makes these bars an irresistible treat that everyone will love.
Understanding the Ingredients
Creating the perfect frozen strawberry shortcake bars starts with understanding the key components of the recipe. Each ingredient plays a crucial role in achieving the right balance of flavor and texture.
The Crust Ingredients
The foundation of our frozen strawberry shortcake bars is the crust, which is made from a simple mixture of graham cracker crumbs, sugar, butter, and a hint of vanilla.
– Graham Cracker Crumbs: The primary component of the crust, graham cracker crumbs provide a sweet and slightly nutty flavor, along with a sturdy base for the bars. They are finely crushed to ensure an even texture.
– Sugar: A touch of sugar is added to enhance the natural sweetness of the crust, ensuring it complements the filling beautifully.
– Butter: Melted butter is essential for binding the crumbs together and providing richness. It also contributes to the overall texture, making the crust tender yet firm enough to hold the bars together.
– Vanilla: A splash of vanilla extract elevates the flavor of the crust, lending a warm, aromatic quality that harmonizes with the strawberries.
Importance of Fresh Strawberries
The filling of the frozen strawberry shortcake bars relies heavily on fresh strawberries. These vibrant berries are not only the stars of the dish but also provide essential flavor and texture. Their natural sweetness and tartness create a balanced filling that captivates the palate. When selecting strawberries, look for firm, ripe berries with a bright red color and a sweet aroma. Fresh strawberries contribute to the overall freshness of the dessert, making it a perfect summer treat.
Heavy Cream and Whipped Cream
For a rich and creamy filling, heavy cream is a key ingredient. It adds a luxurious texture that elevates the bars above typical frozen desserts. When whipped, heavy cream transforms into a light and airy topping that complements the strawberry filling. The whipped cream serves not only as a delightful topping but also as a crucial component of the filling itself, providing a velvety mouthfeel.
Crafting the Perfect Crust
Now, let’s dive into the steps involved in preparing the crust—an essential base for our frozen strawberry shortcake bars. The process is straightforward and can be completed in just a few simple steps.
Step 1: Prepare the Graham Cracker Crumbs
Start by finely crushing the graham crackers. You can place them in a food processor for a quick and even result, or use a resealable plastic bag and a rolling pin for a more hands-on approach. Aim for a fine crumb texture, which will help the crust adhere together.
Step 2: Mix the Ingredients
In a mixing bowl, combine the crushed graham crackers with sugar and melted butter. Pour in the vanilla extract, and mix until the crumbs are evenly coated with butter. This mixture should hold together when pressed, indicating it’s ready for the next step.
Step 3: Pressing the Crust
To create an even and firm crust, transfer the mixture to a baking dish lined with parchment paper. Use the back of a measuring cup or your fingers to firmly press the crumb mixture into the bottom of the dish, ensuring an even layer across the surface. This step is crucial for achieving a consistent texture throughout the bars.
Step 4: Chill
Once pressed, place the crust in the refrigerator for at least 30 minutes. Chilling the crust allows it to firm up, making it easier to slice into bars later on. The melted butter will solidify, providing a sturdy foundation for the filling.
Creating the Strawberry Filling
With the crust set, it’s time to create the star of the show: the strawberry filling. This step involves a few simple processes that ensure the filling is both flavorful and perfectly textured.
Step 1: Prepare the Strawberries
Begin by washing and hulling the fresh strawberries. You can cut them into small pieces or mash them, depending on your desired texture. If you prefer a smoother filling, mashing the strawberries will blend better with the cream.
Step 2: Balancing Sweetness
In a saucepan over medium heat, combine the prepared strawberries with a bit of sugar. The sugar will help draw out the juices from the strawberries, creating a sweet syrup-like mixture. To enhance the flavor, add a splash of fresh lemon juice. The acidity from the lemon will balance the sweetness of the strawberries and elevate the overall flavor profile.
Step 3: Thickening with Cornstarch
To achieve the right consistency for the filling, incorporate cornstarch into the mixture. Start by dissolving the cornstarch in a small amount of water to create a slurry. As the strawberry mixture heats up, gradually stir in the cornstarch slurry, allowing it to thicken. This step is essential for preventing the filling from becoming too runny once it’s frozen.
Step 4: Cooking the Strawberries
Continue to cook the strawberry mixture for a few minutes until it thickens and becomes glossy. This process not only helps the filling set properly but also intensifies the flavor of the strawberries. Once done, remove the mixture from heat and let it cool before incorporating it into the whipped cream.
Whipping the Cream to Perfection
The final step in assembling the filling involves whipping the heavy cream to create light and airy peaks. This step is crucial for achieving the perfect texture in your frozen strawberry shortcake bars.
Step 1: Preparing the Cream
Ensure your mixing bowl and beaters are clean and chilled, as this will help the cream whip more effectively. Pour the heavy cream into the bowl and start mixing on low speed to prevent splatters.
Step 2: Understanding Peaks
As you whip the cream, keep an eye on its progression. You’ll want to reach soft peaks—where the cream holds a gentle shape but is still somewhat fluid—or stiff peaks, which are firmer and hold their shape well. For this recipe, stiff peaks are preferred, as they will maintain structure once mixed with the strawberry filling.
Step 3: Avoiding Over-Whipping
Be cautious not to over-whip the cream. If whipped too long, it can turn grainy and eventually separate into butter. Stop whipping as soon as you reach the desired peak consistency.
Step 4: Combining with Strawberry Mixture
Gently fold the strawberry mixture into the whipped cream until fully incorporated. Be careful not to deflate the whipped cream, as you want to maintain the lightness of the filling.
With these initial steps completed, you are well on your way to creating delicious frozen strawberry shortcake bars that are sure to impress. The combination of a buttery crust, creamy filling, and fresh strawberries makes these bars a perfect treat for any summer occasion, offering a refreshing way to celebrate the season’s bounty. Stay tuned for the next part, where we will delve into the assembly and freezing process for these delightful bars.
{{image_2}}
Combining Layers for Texture
To achieve the perfect balance of flavors and textures in your frozen strawberry shortcake bars, the key lies in properly combining the strawberry mixture with the whipped cream. Begin by folding the strawberry puree into the whipped cream. This is where patience and technique come into play.
1. Folding Technique: Using a rubber spatula, gently scoop the strawberry puree from the bottom of the bowl and lift it over the whipped cream. Rotate the bowl as you fold, ensuring you’re incorporating the puree without aggressively mixing. This technique preserves the airiness of the whipped cream, which is crucial for a light and fluffy dessert.
2. Maintaining Airiness: The goal is to keep the whipped cream as airy as possible. If you overmix, you risk deflating the whipped cream, resulting in a denser texture. A good rule of thumb is to fold just until you no longer see streaks of white. You want a marbled effect where the strawberries are beautifully swirled into the cream, creating a visually appealing layer.
3. Final Consistency: The mixture should be thick yet soft enough to spread easily over the crust. If the mixture is too runny, it may seep through the crust, compromising the structural integrity of your bars. Aim for a consistency that holds its shape while still being creamy.
Assembling the Frozen Bars
Now that you have your strawberry and whipped cream mixture ready, it’s time to assemble your frozen bars.
1. Pouring the Filling: Carefully pour the strawberry mixture over the prepared crust in your baking dish. Use a spatula to gently spread the filling evenly across the surface, ensuring every corner of the crust is covered.
2. Removing Air Bubbles: To achieve a smooth finish, gently tap the pan on the countertop. This step is essential as it helps release any trapped air bubbles, ensuring a consistent texture throughout the bars.
3. Freezing Process: Cover the baking dish with plastic wrap or aluminum foil and place it in the freezer. For optimal texture, allow the bars to freeze for at least 6 hours or overnight if possible. This extended freezing time helps the flavors meld together beautifully while creating a firm yet creamy dessert.
Serving Suggestions
Once your frozen strawberry shortcake bars are fully set, it’s time to enjoy them. Here are some tips for cutting and serving:
1. Cutting the Bars: For clean cuts, remove the bars from the baking dish by lifting the parchment paper. Use a sharp knife dipped in hot water for each cut. This technique ensures smooth slices without dragging the filling.
2. Allowing to Sit: Before serving, let the bars sit at room temperature for about 5-10 minutes. This slight thawing makes the bars easier to slice and enhances the flavors as they soften slightly.
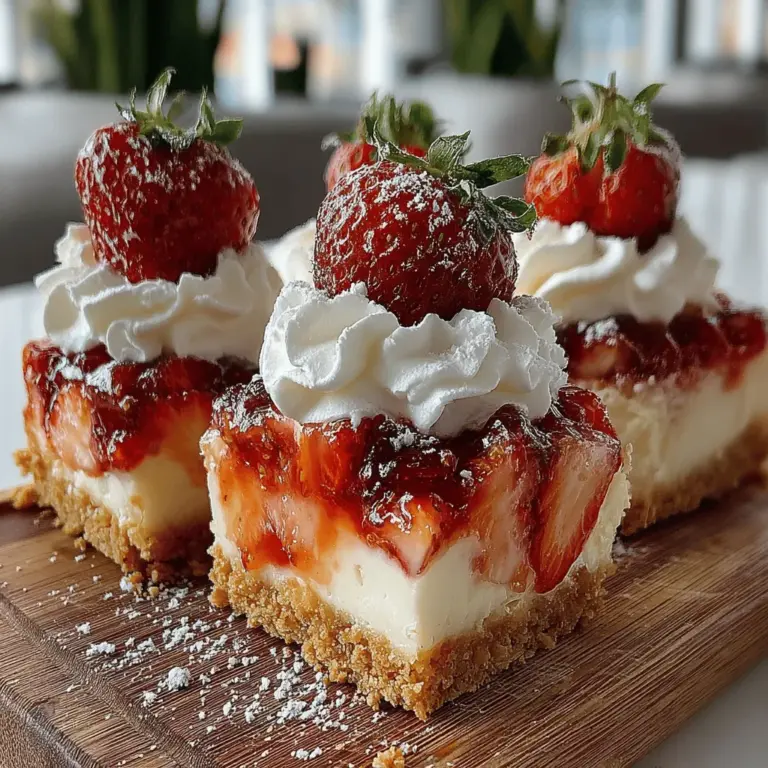
3. Garnishing: Consider garnishing each bar with a dollop of whipped cream and a fresh strawberry on top. This not only adds a pop of color but also enhances the overall presentation and flavor.
Pairing and Presentation
To elevate the serving experience, consider these creative presentation ideas:
1. Chilled Plates: Serve your frozen bars on chilled plates to keep them from melting too quickly. This simple touch can make a significant difference in the enjoyment of this cool treat, especially on a warm day.
2. Homemade Strawberry Sauce: Drizzle some homemade strawberry sauce on the plate for an added layer of flavor. This can be made by simmering fresh strawberries with a bit of sugar until they break down into a sauce. It adds a beautiful contrast and a vibrant splash of color to your dessert.
3. Summer Centerpiece: These frozen strawberry shortcake bars make not only a delicious dessert but also a stunning centerpiece for summer gatherings. Their vibrant color and refreshing taste are sure to impress guests at barbecues, picnics, or family reunions.
Nutritional Information
While indulging in these delicious frozen strawberry shortcake bars, it’s good to keep in mind their nutritional aspects.
1. Fresh Ingredients: The bars are made with fresh strawberries, which are rich in vitamins, antioxidants, and fiber. This healthy fruit not only enhances the flavor but also adds nutritional value.
2. Balance of Flavors: The combination of sweet strawberries and creamy filling creates a balanced flavor profile that satisfies your sweet tooth without being overwhelming.
3. Portion Sizes: Each bar can be cut into generous squares. Depending on how you decide to serve them, you can adjust the portion sizes to suit your occasion. A small bar is typically around 100-150 calories, making it a guilt-free treat when enjoyed in moderation.
Conclusion
Making frozen strawberry shortcake bars is a delightful and straightforward process that results in a light and refreshing dessert perfect for warm days. With their creamy texture and vibrant strawberry flavor, these bars encapsulate the essence of summer in every bite. Ideal for family gatherings, picnics, or just a sweet treat after dinner, they are sure to become a favorite in your dessert rotation.
Encouraging readers to try this recipe will allow them to experience the joy of creating something special at home. With just a few simple steps, you can savor the taste of summer, bringing joy to your table and delighting everyone who gets to enjoy this delicious treat. So grab your ingredients, get mixing, and prepare to indulge in the ultimate frozen dessert!
