Crunchy Peanut Butter Bliss Bars Recipe
In recent years, no-bake treats have surged in popularity among home cooks and food enthusiasts alike. With their ease of preparation and minimal cooking requirements, no-bake recipes like Crunchy Peanut Butter Bliss Bars have become a go-to option for those looking to enjoy a delicious snack without spending hours in the kitchen. These bars not only satisfy your sweet tooth but also offer a healthy alternative to traditional desserts, making them an appealing choice for health-conscious individuals and families.
Crunchy Peanut Butter Bliss Bars are not just another sweet treat; they’re a delightful balance of flavors and textures that will leave you feeling satisfied and energized. Whether you’re looking for a midday snack, a post-workout boost, or a guilt-free dessert, these bars check all the boxes. The recipe is simple enough for beginners yet versatile enough for seasoned bakers to experiment with. Additionally, it accommodates various dietary preferences, making it a perfect fit for gluten-free, vegan, and even paleo diets, depending on your ingredient choices.
The Allure of Peanut Butter
At the heart of these bliss bars lies the beloved ingredient: peanut butter. This staple pantry item is cherished not only for its rich, creamy texture and nutty flavor but also for its impressive nutritional profile. Natural peanut butter is packed with protein, healthy fats, and essential vitamins and minerals, making it a nutritious choice for anyone looking to boost their energy levels.
Peanut butter is incredibly versatile in the world of desserts and snacks. It can be used in a myriad of recipes, from cookies to smoothies, adding a delightful taste and a creamy consistency. Its natural sweetness pairs beautifully with other flavors, making it a fantastic base for various treats. Moreover, the healthy fats found in peanut butter can help keep you feeling full and satisfied, making it a great addition to a balanced diet.
Understanding the Ingredients
Creating the perfect Crunchy Peanut Butter Bliss Bars requires a careful selection of ingredients. Each component contributes to the overall flavor, texture, and nutritional value of the bars. Here’s a detailed look at the main ingredients you’ll need:
1. Natural Peanut Butter: The choice between creamy and crunchy peanut butter can influence both texture and taste. Creamy peanut butter will yield a smooth, dense bar, while crunchy peanut butter introduces delightful bits of peanuts for added texture. Both types bring the same nutritional benefits, so the choice ultimately depends on your personal preference.
2. Honey vs. Maple Syrup: Both honey and maple syrup serve as natural sweeteners in this recipe. Honey has a distinct flavor profile that complements the nutty notes of peanut butter, while maple syrup offers a more subtle sweetness with a hint of caramel. Each sweetener has its unique set of health benefits; honey is known for its antibacterial properties, and maple syrup contains antioxidants and essential minerals. Choose the one that resonates with your taste or dietary needs.
3. Rolled Oats: These whole grains are not just a source of complex carbohydrates; they provide dietary fiber and important nutrients such as iron and magnesium. In this recipe, rolled oats help bind the bars together while also adding a chewy texture that contrasts beautifully with the crunchiness of the peanut butter.
4. Crispy Brown Rice Cereal: This ingredient is key to achieving the delightful crunch that sets these bliss bars apart. Crispy brown rice cereal adds lightness and texture without overpowering the other flavors, making your bars satisfying without being overly dense.
5. Cocoa Powder: Unsweetened cocoa powder enhances the flavor of the bars, adding a rich chocolatey depth that complements the peanut butter. It also offers health benefits, such as antioxidants and potential heart health advantages, making it a smart addition to your snack.
6. Vanilla Extract: Often considered a staple in dessert recipes, vanilla extract adds a layer of aromatic flavor that elevates the overall taste of the bars. Its sweet and slightly floral notes create a harmonious balance with the other ingredients.
7. Optional Ingredients: For those who want to take their Crunchy Peanut Butter Bliss Bars to the next level, consider adding dark chocolate chips or chopped nuts. Dark chocolate chips contribute an indulgent sweetness and antioxidants, while nuts can enhance the nutritional profile with additional healthy fats and protein.
Step-by-Step Guide to Making Crunchy Peanut Butter Bliss Bars
Now that you have an understanding of the ingredients and their benefits, let’s dive into the step-by-step process of making your own Crunchy Peanut Butter Bliss Bars. The simplicity of this recipe makes it perfect for both novice and experienced cooks alike.
Step 1: Gather Your Ingredients
Before you start, ensure you have all the ingredients ready and measured out. This will streamline the process and help prevent any unexpected interruptions.
Step 2: Prepare Your Pan
Line an 8×8 inch square baking pan with parchment paper. This will make it easier to remove the bars once they have set and will ensure they don’t stick to the pan.
Step 3: Mix the Wet Ingredients
In a medium saucepan over low heat, combine the natural peanut butter and your choice of sweetener (honey or maple syrup). Stir continuously until the mixture is smooth and well combined. This step is crucial, as it helps to blend the flavors and ensures your bars have a consistent texture.
Step 4: Combine the Dry Ingredients
In a large mixing bowl, combine the rolled oats, crispy brown rice cereal, cocoa powder, and any optional ingredients like chocolate chips or nuts. Mix them together thoroughly to ensure an even distribution of flavors and textures.
Step 5: Combine Wet and Dry Ingredients
Once your peanut butter mixture is melted and smooth, pour it over the dry ingredients. Use a spatula to fold the mixture together until everything is evenly coated. This is where you can get creative; if you prefer a softer texture, you can add a splash of non-dairy milk to help with the mixing.
Step 6: Press the Mixture into the Pan
Transfer the mixture to the prepared baking pan. Using the back of a spatula or your hands, press the mixture firmly and evenly into the pan. This step is essential for ensuring that the bars hold together once they are set.
Step 7: Chill to Set
Place the pan in the refrigerator for at least an hour, allowing the bars to firm up. This chilling time is critical, as it helps the bars achieve the perfect texture that’s both chewy and crunchy.
By following these steps, you’ll be well on your way to creating a batch of Crunchy Peanut Butter Bliss Bars that are not only delicious but also nutritious. Stay tuned for the next part of the article, where we’ll explore the finishing touches and creative ways to serve these delightful treats.
{{image_2}}
Preparing the Baking Dish
Before you start mixing your ingredients, it is essential to prepare your baking dish properly. Using an 8×8-inch square pan is ideal for this recipe, as it allows the bars to set evenly. To ensure easy removal of the bars once they are ready, line the bottom and sides of the pan with parchment paper. Leave some overhang on the sides; this will act as handles when you lift the bars out later. Greasing the paper lightly with cooking spray or a thin layer of oil can also help prevent sticking. Properly preparing your baking dish is crucial to achieving the perfect texture and presentation for your Crunchy Peanut Butter Bliss Bars.
Melting the Peanut Butter and Sweetener
The next step involves melting your peanut butter and sweetener to create a smooth, creamy mixture. You can achieve this by using a microwave-safe bowl. Add your peanut butter and sweetener, such as maple syrup or agave nectar, and heat in the microwave for 30-second intervals, stirring in between. This method helps avoid overheating, which can cause the peanut butter to become too oily or clumpy. Aim for a consistency that is smooth and pourable but not too runny—this balance is key to achieving the right texture in your finished bars.
Combining Dry Ingredients
While your peanut butter and sweetener mixture is melting, it’s time to prepare your dry ingredients. In a separate bowl, combine rolled oats, protein powder, and any additional dry flavorings like cinnamon or a pinch of salt. Ensure that these ingredients are evenly distributed, as this will help create a uniform texture throughout the bars. For the best results, consider using a whisk or fork to break up any clumps, especially if you are using protein powder. Properly combining your dry ingredients is essential to prevent any uneven flavors or textures in the final product.
Mixing Everything Together
Once you have your melted peanut butter mixture and your dry ingredients ready, it’s time to combine them. Pour the warm peanut butter mixture into the bowl with the dry ingredients. Using a spatula or wooden spoon, start mixing everything together. The warmth of the peanut butter will help the dry ingredients to absorb moisture and stick together. Be thorough in your mixing; you want to ensure that all dry ingredients are fully incorporated into the mixture. A well-mixed batter will lead to evenly textured bars and avoid any dry spots.
Incorporating Optional Ingredients
To elevate the flavor of your Crunchy Peanut Butter Bliss Bars, consider incorporating optional ingredients like chocolate chips or chopped nuts. Dark chocolate chips can add a rich sweetness, while chopped almonds or walnuts can enhance the crunch factor. If you choose to add these extras, fold them in gently after the initial mixture is combined. This step ensures even distribution without breaking up the chocolate or nuts. The optional ingredients will not only enhance the flavor but also add nutritional value, making your bars even more satisfying.
Pressing the Mixture into the Pan
Now that your mixture is ready, it’s time to transfer it into the prepared baking dish. Pour the mixture into the pan and use your spatula to spread it out evenly. Once spread, it’s crucial to press the mixture down firmly into the pan. Use the back of a measuring cup or your hands (lightly moistened to prevent sticking) to apply even pressure across the surface. This step helps the bars hold together during cutting and ensures that they set uniformly. A well-pressed mixture will lead to dense, chewy bars that are easy to slice.
Chilling to Set
After pressing the mixture into the pan, place it in the refrigerator to chill. This step is critical as it allows the bars to firm up and set properly. Chilling often takes about 1-2 hours, depending on your refrigerator. The science behind this is simple: the cold temperature helps the fats in the peanut butter solidify, creating a firmer texture. Patience is key here; while it might be tempting to dig in right away, letting the bars chill will greatly enhance their structure and flavor.
Cutting and Storing Tips
Once your Crunchy Peanut Butter Bliss Bars have chilled and set, it’s time to cut them into squares. Lift the bars out of the pan using the parchment paper overhang, and place them on a cutting board. Use a sharp knife to slice them into squares, making sure to clean the knife between cuts for clean edges. For storage, you can keep the bars in an airtight container in the refrigerator for up to a week. For longer storage, consider freezing them. Wrap each bar individually in plastic wrap and place them in a freezer-safe bag. This allows you to enjoy a quick, healthy snack any time!
Nutritional Information and Serving Suggestions
Each Crunchy Peanut Butter Bliss Bar is packed with nutrients and flavor. On average, one bar contains approximately 200 calories, making it a perfect snack or energy booster. In addition to calories, each bar provides a balanced amount of protein (about 6g), healthy fats (approximately 10g from peanut butter), and carbohydrates (around 20g from oats).
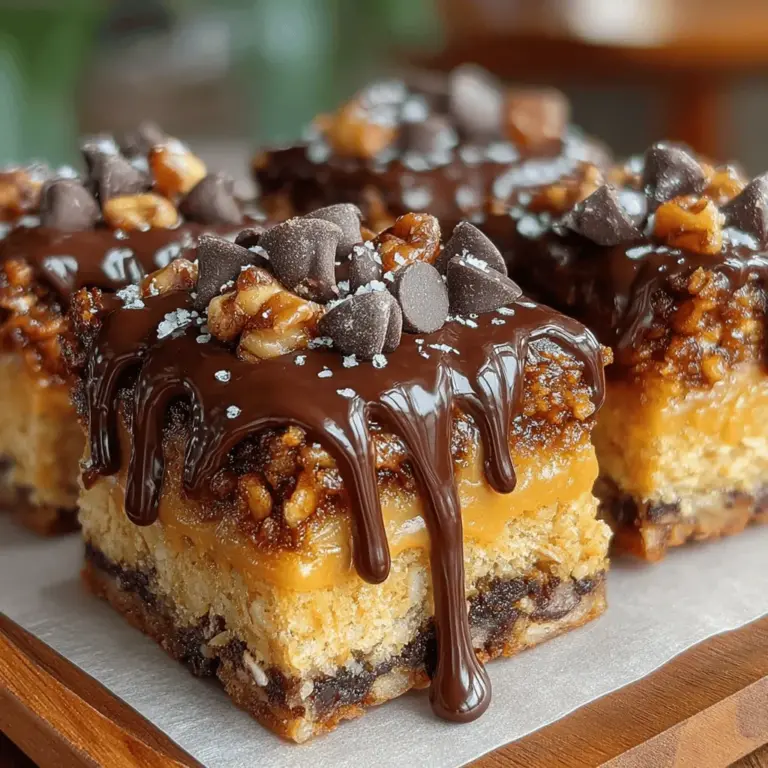
For serving suggestions, consider drizzling melted chocolate over the top for an extra layer of indulgence. You can also garnish the bars with additional chopped nuts or a sprinkle of sea salt for contrast. If you enjoy pairing snacks with beverages, these bars pair beautifully with a glass of almond milk, a warm cup of tea, or a strong coffee, making them a delightful treat at any time of day.
Creative Variations on the Recipe
One of the best aspects of Crunchy Peanut Butter Bliss Bars is their versatility. If you want to customize the recipe, consider the following substitutions:
– Nut Butters: Instead of peanut butter, you can use almond butter, cashew butter, or sunflower seed butter for different flavor profiles.
– Sweeteners: Try using honey, coconut sugar, or a sugar-free sweetener to suit your dietary preferences.
– Flavor Additions: Enhance the flavor by adding spices like cinnamon or nutmeg, or fold in dried fruits such as cranberries or raisins.
– Vegan or Gluten-Free: To make the recipe vegan, ensure your sweetener is plant-based (like maple syrup) and use gluten-free oats. The bars will still be delicious without sacrificing taste or texture.
With these creative variations, you can easily adapt the recipe to suit your tastes and dietary needs.
Conclusion
In summary, Crunchy Peanut Butter Bliss Bars are an easy and healthy snack option that anyone can enjoy. With straightforward ingredients and simple preparation steps, these bars are not only delicious but also provide a satisfying treat that aligns with a health-conscious lifestyle. We encourage you to experiment with the recipe to make it your own—try different nut butters, sweeteners, or flavorings to discover what you love best. Whether you enjoy them as a mid-afternoon snack, a post-workout treat, or a guilt-free dessert, these bars are sure to become a staple in your kitchen. Enjoy the bliss of crunchy peanut butter bars, and embrace the joy of creating your own delightful, nutritious snacks!