
In a fast-paced world where time seems to slip through our fingers, the allure of no-bake desserts has never been more appealing. For busy individuals and families, these easy-to-make treats offer the perfect solution to satisfy sweet cravings without the hassle of lengthy preparation or extensive baking. Among the myriad of options available, the Banana Bliss No-Bake Pudding Cups stand out as a delightful choice that effortlessly combines the comforting flavors of bananas, creamy vanilla pudding, and fluffy whipped cream.
This recipe is particularly enchanting for its simplicity. Whether you’re a novice cook hesitant to step into the kitchen or a seasoned baker seeking a quick yet indulgent dessert, Banana Bliss No-Bake Pudding Cups are designed to impress with minimal effort. With just a handful of ingredients and straightforward steps, you can create a delightful dessert that will leave everyone asking for seconds.
The Joy of No-Bake Desserts
No-bake desserts are a treasure in the culinary world, offering numerous advantages that cater to the modern lifestyle. First and foremost, they save time. With no need to preheat the oven or monitor baking times, you can whip up a delicious treat in a fraction of the time it would normally take. This convenience is especially beneficial for busy weeknights, last-minute gatherings, or when unexpected guests arrive.
In addition to their time-saving nature, no-bake desserts require minimal cleanup and cooking equipment. Unlike traditional baking, which often involves mixing bowls, measuring cups, and pans, no-bake recipes typically call for just a few bowls and spoons. This simplicity means less time spent washing dishes and more time enjoying your sweet creation.
Moreover, no-bake desserts offer incredible flexibility. You can easily customize them to suit your taste preferences or dietary needs. Want to add a layer of chocolate or swap out bananas for another fruit? The possibilities are endless. This adaptability makes no-bake desserts a favorite among creative home cooks who love experimenting in the kitchen.
Ingredients Overview
To craft the Banana Bliss No-Bake Pudding Cups, you’ll need a selection of simple yet flavorful ingredients. Here’s a closer look at each component and how it contributes to the overall deliciousness of this dessert:
Ripe Bananas
At the heart of this recipe are ripe bananas. Selecting bananas that are perfectly ripe is essential, as their natural sweetness and rich flavor elevate the pudding cups. Ripe bananas have a soft, creamy texture that blends seamlessly into the pudding, providing a delightful contrast to the other components. When choosing bananas, look for ones with a few brown spots, as this indicates optimal ripeness and flavor.
Vanilla Pudding Mix
The key to achieving that luscious, creamy texture lies in the vanilla pudding mix. There are various types available, from instant mixes that require no cooking to stovetop versions that involve simmering. For the Banana Bliss No-Bake Pudding Cups, instant vanilla pudding mix is ideal, as it sets quickly and easily. This mix not only provides a smooth base for the dessert but also infuses it with a rich vanilla flavor that complements the bananas beautifully.
Milk
Milk plays a crucial role in this recipe, helping to achieve the desired pudding consistency. It hydrates the pudding mix and allows it to thicken, creating a creamy texture that is both satisfying and indulgent. Whole milk is commonly used for its richness, but you can also opt for low-fat or plant-based milk alternatives if preferred. The choice of milk can subtly affect the flavor and texture, so choose one that aligns with your taste.
Vanilla Extract
To enhance the flavor profile of the pudding, a splash of quality vanilla extract is essential. This ingredient adds depth and richness, elevating the overall taste of the dessert. When selecting vanilla extract, opt for pure vanilla over imitation varieties to ensure an authentic flavor experience. The aromatic notes of vanilla will complement the bananas and pudding, creating a harmonious blend of flavors.
Whipped Cream
Whipped cream is the crowning glory of the Banana Bliss No-Bake Pudding Cups. It adds a light, airy texture and a touch of sweetness that balances the richness of the pudding. You can choose between store-bought whipped cream for convenience or make your own for a fresher taste. Homemade whipped cream, made from heavy cream and sugar, offers a creamier texture and a burst of flavor that can elevate the entire dessert.
Vanilla Wafers
Lastly, vanilla wafers serve as both a textural component and a flavor enhancer in this delightful dessert. These sweet, crunchy cookies provide a satisfying contrast to the creamy pudding and soft bananas. They can be crushed for a crumbly layer at the bottom of the cups or used whole for a classic presentation. Their vanilla flavor pairs perfectly with the other ingredients, tying the dessert together beautifully.
Step-by-Step Instructions
Now that you have an understanding of the ingredients, let’s dive into the preparation process for the Banana Bliss No-Bake Pudding Cups. Follow these detailed steps to create your own delicious dessert:
1. Prepare the Pudding Mixture: Begin by gathering a mixing bowl and adding the instant vanilla pudding mix. Pour in the appropriate amount of cold milk, as indicated on the package instructions. Whisk the mixture vigorously for about two minutes, or until it thickens to a creamy consistency. This step is crucial for achieving the perfect pudding base.
2. Incorporate Vanilla Extract: Once the pudding mixture has thickened, add in the vanilla extract. Stir gently to incorporate the extract evenly throughout the pudding. This will enhance the flavor and provide that signature vanilla essence that complements the bananas.
3. Slice the Bananas: While the pudding sets, take your ripe bananas and slice them into thin rounds. Aim for uniform slices to ensure even distribution throughout the pudding cups. Depending on your preference, you can also reserve a few slices for garnish.
4. Assemble the Pudding Cups: To assemble the Banana Bliss No-Bake Pudding Cups, begin by placing a layer of vanilla wafers at the bottom of each serving cup. This will create a delightful crunch that contrasts with the creamy pudding and soft bananas. Next, spoon a layer of the prepared pudding over the wafers, followed by a layer of sliced bananas.
5. Repeat Layering: Continue layering the components, alternating between vanilla wafers, pudding, and banana slices until you reach the top of the cups. Aim for at least two to three layers for a visually appealing and satisfying dessert. Finish with a generous dollop of whipped cream on top to create a beautiful presentation.
6. Chill and Serve: Once assembled, place the pudding cups in the refrigerator to chill for at least 30 minutes. This allows the flavors to meld and the pudding to set further. When ready to serve, you can add additional whipped cream or banana slices for garnish, if desired.
With these simple steps, you’ll have a batch of Banana Bliss No-Bake Pudding Cups ready to delight your family or guests. This recipe is not only easy to follow but also delivers an impressive and delicious dessert that showcases the natural flavors of bananas and the creamy goodness of vanilla pudding. Stay tuned for the next part of this article, where we’ll explore variations of this recipe and tips for making it even more delightful!
{{image_2}}
Preparing the Pudding Mixture
The first step in creating your Banana Bliss No-Bake Pudding Cups is to prepare the pudding mixture, which serves as the luscious base of this delightful dessert. Begin by whisking together the instant pudding mix with cold milk in a large mixing bowl. This step is crucial, as the right ratio of pudding mix to milk not only ensures proper flavor but also affects the final texture of your pudding.
As you whisk, you’ll notice the mixture starting to thicken. This transformation is vital; a well-thickened pudding will result in a creamy, velvety texture that perfectly complements the other layers in your pudding cups. Aim for a consistency that is thick enough to hold its shape but still smooth enough to be spooned easily. If the pudding appears too runny, give it a few more minutes of whisking to allow the thickeners in the pudding mix to activate fully.
Incorporating the Whipped Cream
Once your pudding mixture has reached the desired thickness, it’s time to fold in the whipped cream. This step is essential for achieving a light and airy texture that balances the richness of the pudding. To do this, use a spatula to gently fold the whipped cream into the pudding mixture. Start by adding a small portion of the whipped cream to lighten the pudding, then gradually incorporate the remaining whipped cream.
Be mindful during this process; the goal is to retain as much air as possible in the whipped cream. Avoid vigorous stirring, which can deflate the mixture and result in a denser pudding. Instead, use a gentle folding motion, scraping the sides of the bowl and turning the mixture over itself. This technique ensures that your pudding remains fluffy and has that delightful, cloud-like quality.
Layering the Cups
Now comes the fun part—layering the ingredients in your cups! For the best flavor distribution and visual appeal, follow these steps:
1. Start with a Base of Wafers: Begin by placing a layer of graham cracker or vanilla wafer crumbs at the bottom of each cup. This layer not only provides a crunchy contrast to the creamy pudding but also absorbs some moisture, enhancing the overall texture.
2. Add the Pudding: Spoon a generous layer of the prepared pudding mixture over the wafers. Aim to fill the cups about halfway, allowing room for additional layers.
3. Banana Slices: Next, add a layer of fresh banana slices. The natural sweetness and creamy texture of bananas will beautifully complement the pudding.
4. Repeat the Layers: Continue layering with more wafers, followed by pudding, and then banana slices until you reach the top of the cup. For an attractive finish, you might want to end with a layer of whipped cream.
To ensure even layers, use a small offset spatula or the back of a spoon to smooth out each layer. This attention to detail will make for a stunning presentation that’s sure to impress your guests.
Final Touches and Chilling
After assembling your pudding cups, it’s crucial to let them chill in the refrigerator. Chilling not only enhances the flavors but also allows the wafers to soften, creating a harmonious blend of textures. Aim to chill your cups for at least two hours, though overnight is even better if you have the time. This resting period allows the bananas to infuse their flavor into the pudding while the layers meld together beautifully.
When you’re ready to serve, you’ll notice that the pudding is set, the layers have blended, and the overall texture is creamy and smooth—a perfect treat for a warm day or any occasion.
Serving Suggestions
To elevate your Banana Bliss No-Bake Pudding Cups, consider these creative serving suggestions:
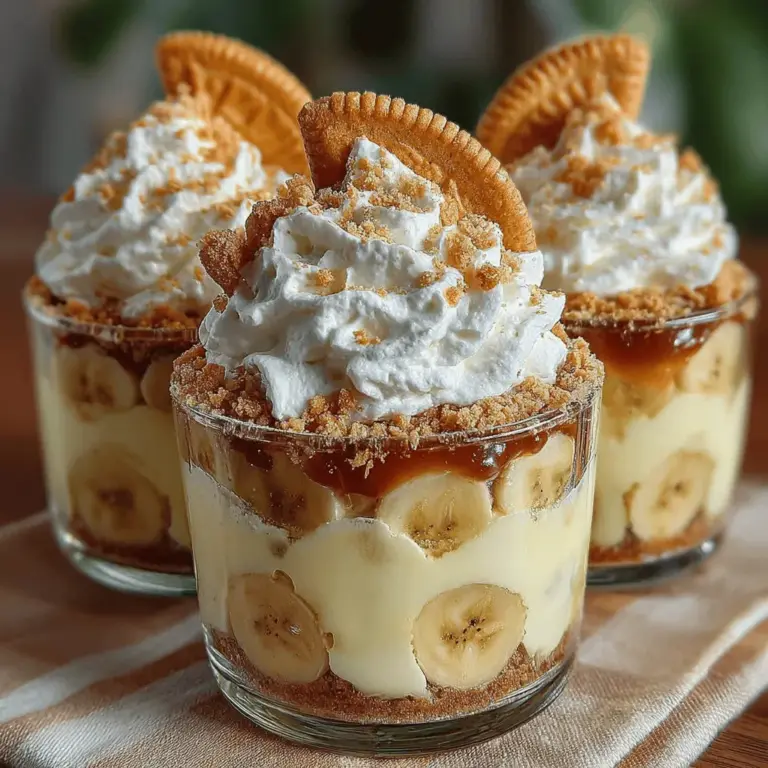
– Presentation: For a beautiful display, serve your pudding cups in clear glass containers that showcase the lovely layers. Consider using mason jars, parfait cups, or elegant dessert glasses.
– Personalized Toppings: Encourage customization by offering a variety of toppings. Consider options like chocolate shavings, toasted coconut, crushed nuts, or even a drizzle of caramel sauce. Each guest can create their own unique flavor profile.
– Fresh Mint Garnish: A sprig of fresh mint on top of each cup adds a pop of color and a refreshing aroma, enhancing the overall dessert experience.
– Chocolate Drizzle: For those who enjoy a richer flavor, drizzle melted chocolate over the top layer of whipped cream before serving. This simple addition can elevate the dessert to a new level of indulgence.
Nutritional Information
The Banana Bliss No-Bake Pudding Cups not only satisfy your sweet tooth but also offer some nutritional benefits, especially from the fresh bananas used in the recipe. Here are some key points:
– Bananas: Rich in potassium and dietary fiber, bananas contribute to heart health and digestive wellness. They also provide a natural sweetness to the pudding, reducing the need for additional sugar.
– Calcium: The milk used in the pudding adds a healthy dose of calcium, essential for strong bones and teeth.
– Lightened Dessert: By incorporating whipped cream and using whole ingredients, this dessert is still light enough to enjoy without guilt. The use of instant pudding mix allows for quick preparation while maintaining great taste.
– Balanced Treat: With a combination of carbs, fats, and a bit of protein from the milk and whipped cream, these pudding cups offer a balanced dessert option that can fit into various dietary preferences.
Conclusion
The Banana Bliss No-Bake Pudding Cups are not just a dessert; they are a delightful experience that combines creamy pudding, fresh bananas, and a satisfying crunch from the wafers. This easy-to-make recipe is perfect for any occasion, whether you’re hosting a family gathering, a potluck, or simply seeking a refreshing treat at home.
With minimal effort and no baking required, you can whip up these pudding cups in no time. The result is a charming, layered dessert that is sure to be a hit with both kids and adults alike. So gather your ingredients, follow the simple steps, and enjoy the blissful combination of flavors and textures. Don’t hesitate to make this recipe yours—experiment with toppings and presentation to create a dessert that reflects your personal style. Prepare to be delighted by the praises from your family and friends as they savor each spoonful of your delicious, homemade Banana Bliss No-Bake Pudding Cups!
